REVIEW · LA PAZ
From La Paz: Huayna Potosí 2-Day Climbing Trip
Book on GetYourGuide →Operated by Climbing South America · Bookable on GetYourGuide
Huayna Potosí mixes big-mountain views with real ice-climbing. I love that you get a guided ramp-up from Paso Zongo to high camp, then a focused summit attempt with crampons on. You’ll also get glacier time close up, plus a panorama you can’t fake: Illimani one direction, Illampu the other. The main consideration is that this is physically demanding and you need solid altitude readiness.
What makes this trip especially interesting is how it’s built for people who want their first true climb-at-altitude experience without going totally DIY. Day 1 is about getting you moving and set up, while Day 2 is the long push—9 to 13 hours depending on conditions. If weather turns, you’ll want to understand that refunds don’t apply for cancellations due to bad weather, so plan with some flexibility in mind.
In This Review
- Key Things That Matter on a Huayna Potosí 2-Day Summit
- From La Paz to Paso Zongo: Why Day 1 Starts the Right Way
- High Camp at 5,150 m: The Overnight That Makes or Breaks Tomorrow
- Gear you’ll want to have ready (and what’s covered)
- Day 2 Glacier Climb: Crampons, Two Steep Sections, and an Exposed Finish
- The Descent Back to High Camp (and Why Packing Fast Matters)
- Price and Value: Is $319 Fair for a 6,000 m Summit Attempt?
- Fitness, Altitude, and Acclimatization: Your Real Checklist
- Diamox and safety
- What’s Included in Real Life: Guides, Ratio, and Support
- Weather Reality: What You Should Plan For
- Who This Trip Fits Best (and Who Should Rethink It)
- Should You Book Huayna Potosí for Two Days?
- FAQ
- How long is the La Paz to Huayna Potosí trip?
- Where does the first day start and how do you get higher?
- What altitude do you sleep at?
- What is the highest point you reach?
- How long is the summit day?
- Is oxygen used during the ascent?
- What climbing gear is included?
- Do I need to bring a sleeping bag?
- What about medications like Diamox?
- What should I bring and what’s not included?
Key Things That Matter on a Huayna Potosí 2-Day Summit

- A true high-camp start (not just a hike): you sleep at 5,150 m at the base of the glacier.
- Two steep glacier sections: including the Pala Chica ice/snow wall around 5,600 m.
- Summit altitude is real: 6,088 m with an exposed ridge final section.
- Guide support is structured: about 1 guide to 2 participants in shared groups, or 1 to 1 in private.
- Equipment is largely handled for you: boots, crampons, ice ax, harness, helmet, ropes/protection included.
From La Paz to Paso Zongo: Why Day 1 Starts the Right Way
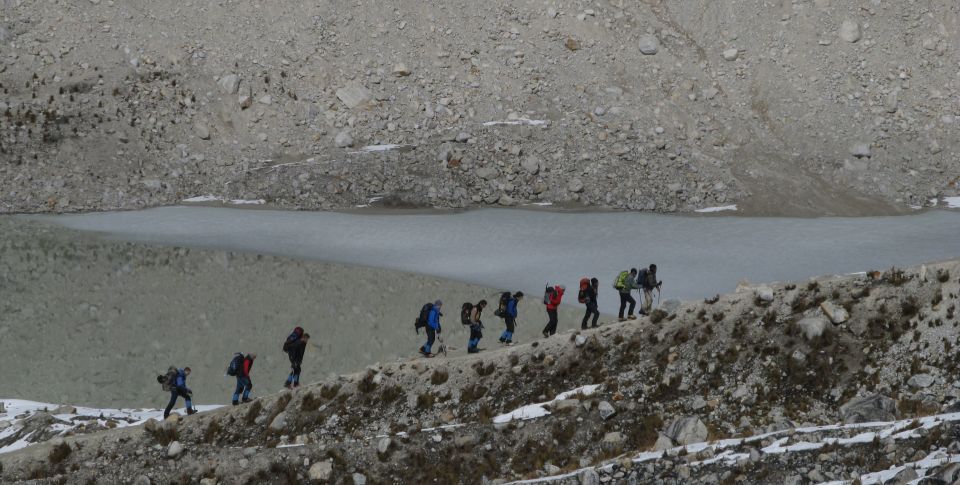
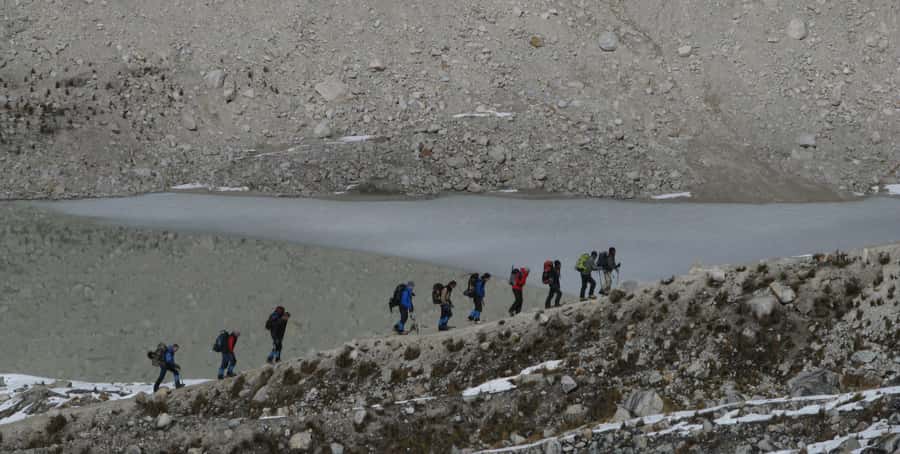
Day 1 is all about setting your body up for the altitude and making tomorrow feel possible. You’ll drive about 1.5 hours from La Paz toward Paso Zongo, climbing from roughly 3,600 m to 4,700 m. That’s not just travel—it’s your first altitude step, and it matters for how well you sleep and move later.
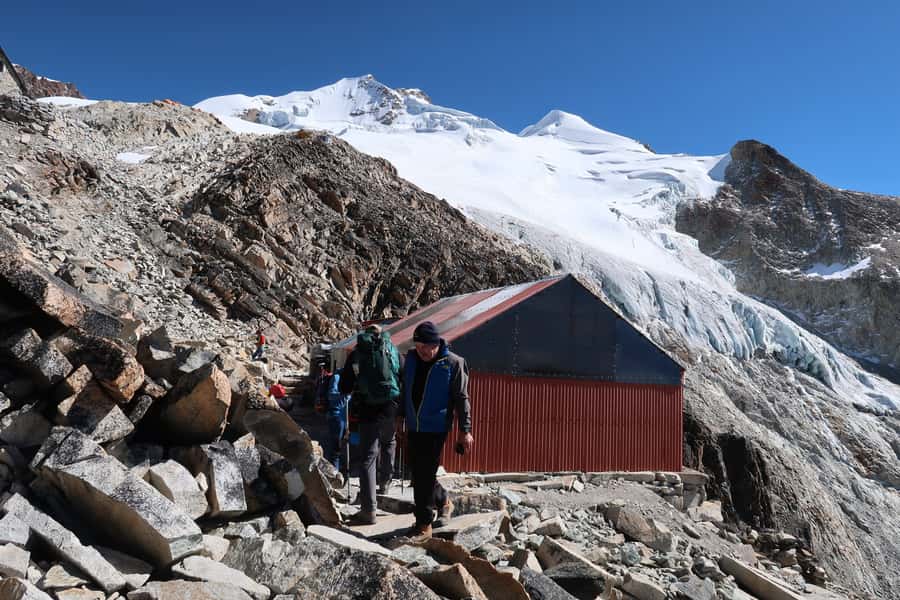
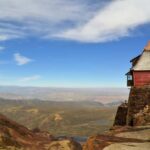
At Paso Zongo, you’ll pause for lunch at one of the refuges. From there you switch to trekking: a 3 to 4 hour uphill walk on a well-used path that climbs up rock to high camp. The “well-used” part is important. It means you’re not figuring out routes in the dark or in confusion; you’re working on pace and breathing while your guide handles the climb logistics.
High camp is at about 5,150 m, on a rock buttress at the base of the glacier. You’re not just there to “arrive”—you get time to gear up, rest, eat dinner, and rehydrate. A lot of summit attempts fail because people treat the day before like a bonus hike. This format treats it like altitude preparation.
Practical note: you’ll likely do a gear check either the day before or around 45 minutes before the climb. Don’t treat this as a casual moment. Bring your items so you’re not scrambling for gloves, layers, or basics at the last minute.
You can also read our reviews of more tours and experiences in La Paz
High Camp at 5,150 m: The Overnight That Makes or Breaks Tomorrow
Sleeping at high camp is the big character of this trip. You’ll have a 1-night stay at the refugio, with main meals and drinks included and a cook on site. You also get the help of an oxygen bottle for emergencies—but only up to high camp, and not for use during the summit climbing itself.
That emergency-only oxygen detail is worth your attention. It tells you the operator is planning for realistic scenarios, not assuming oxygen will be your “crutch” for the summit. So you should be thinking about acclimatization and pacing, not planning on bottled oxygen during the hardest part.
You’ll turn in early. And yes, you’ll likely feel it the moment you lie down—altitude can make sleep fitful. What helps is the simple structure: you rest, fuel, and get your gear ready so Day 2 starts smooth.
Gear you’ll want to have ready (and what’s covered)
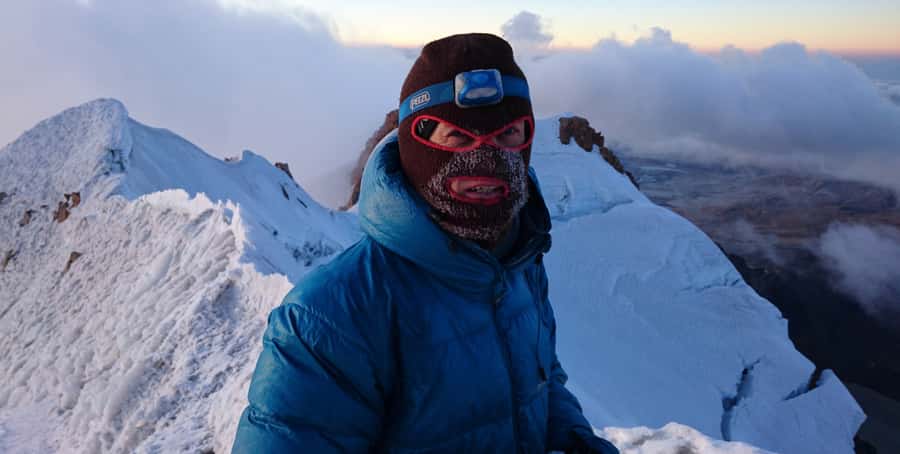
The provided kit includes climbing gear like double mountaineering boots, ice ax, crampons, harness, ropes and protection, and a lot of cold-weather items (extra jackets/pants, thick gloves, balaclava, gaiters, helmet). If you book add-ons, you may also get a sleeping bag and/or backpack.
But even with gear provided, you still need to bring essentials like sunglasses, sunscreen, gloves (bring your own too, since cold gloves are personal), socks, and warm/thermal clothing. The tour also notes a 50-liter backpack and a sleeping bag rated for around -10°C. If you don’t own one, ask about the add-on sleeping bag so you don’t show up underpacked.
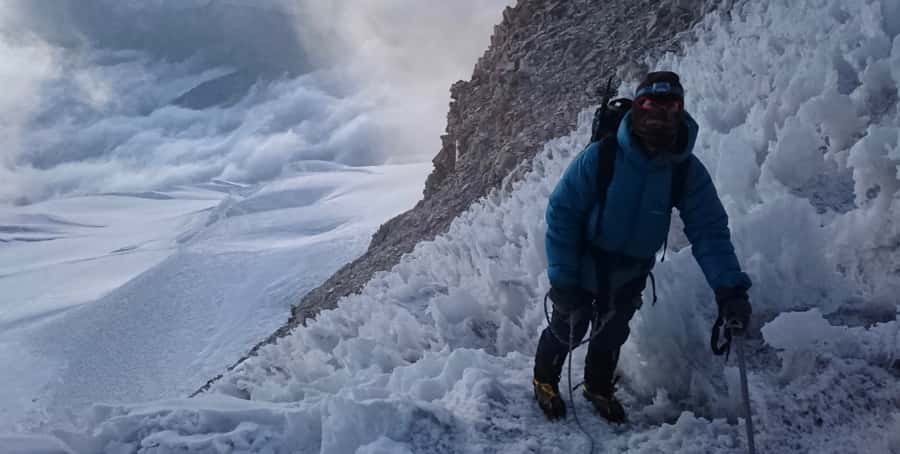
Day 2 Glacier Climb: Crampons, Two Steep Sections, and an Exposed Finish
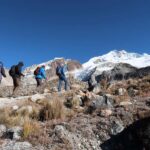
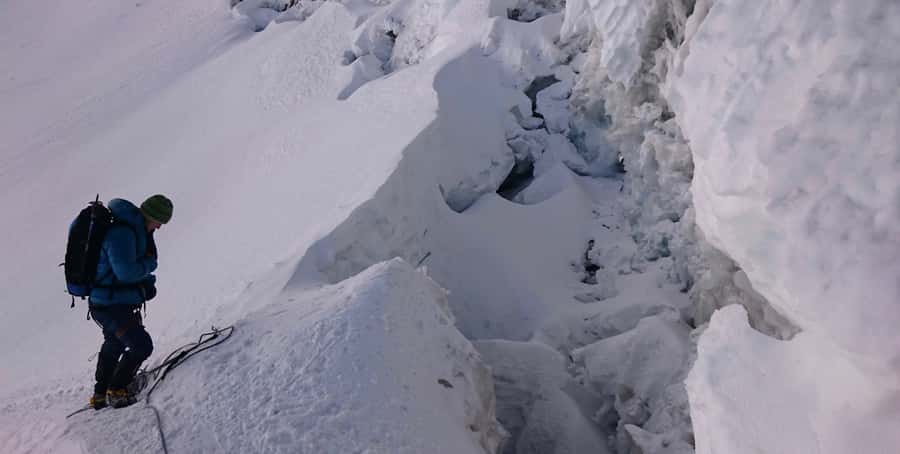
Day 2 is the long one: an early start and a total climb time that can range from 9 to 13 hours. You’ll be wrapped up warm, equipped for climbing, and ready for crampons on the glacier. Expect a day that’s steady effort more than a casual stroll.
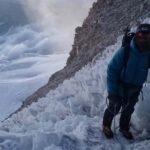
The first part follows a trail on the glacier. Then you hit two steep sections. The first arrives around 5,600 m and is called the Pala Chica. This is where the route goes through a small ice and snow wall about 10 meters high. It’s short, but it’s steep and technical—exactly the kind of section that makes having a guide feel like a safety net, even if you’re fit and confident.
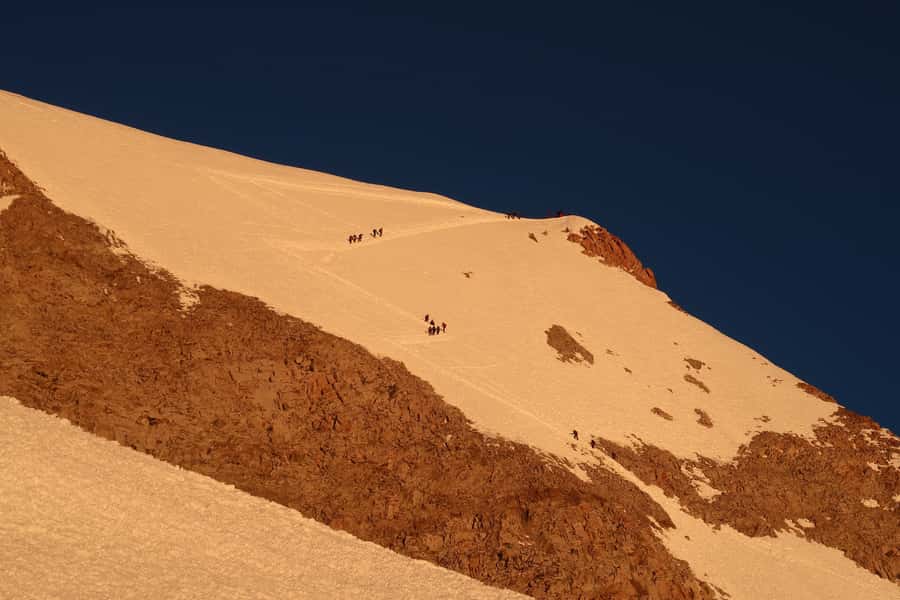
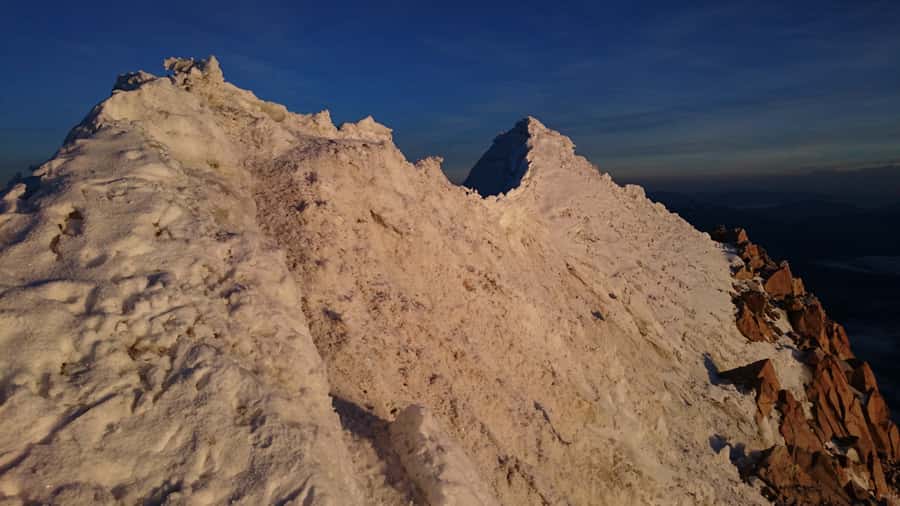
After Pala Chica, you keep climbing on the glacier up toward 6,000 m. At that point, you’ll see the summit ahead at 6,088 m. This is when the trip stops feeling like “a climb” and starts feeling like “the mountain is right there.” You’ll also likely feel the altitude in a very honest way—breath and legs will get tested.
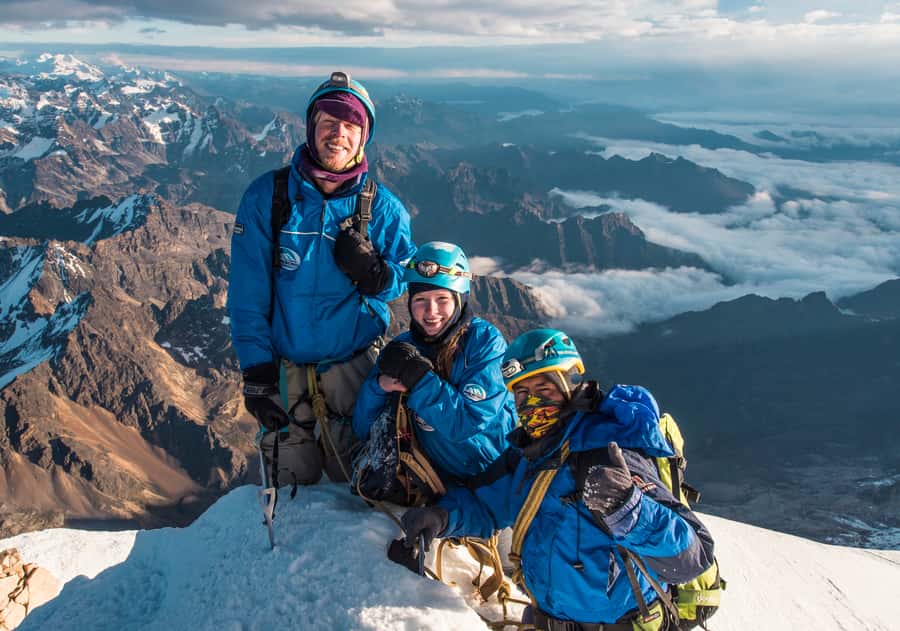
Then comes the last push: the final section to the summit along an exposed ridge. The ridge element is the heart of why Huayna Potosí is famous. It’s not just height; it’s exposure. Your pace matters, and the guide’s job is to keep you moving safely over sections where footing and balance count.
At the top, you’ll get the photo moment and a view that helps you understand the whole Cordillera Real setup. On a clear day, you can see from Illimani (6,439 m) to Illampu (6,368 m). That’s the reward: a line of peaks stretching across the region, not just a single viewpoint.
The Descent Back to High Camp (and Why Packing Fast Matters)
After the summit photos, you head back down to high camp using the same route. There’s a short rest, then you pack your gear and continue down to base camp to meet transportation.
The descent is often where people underestimate effort. Even when it’s the “same way,” your quads will feel it, and fatigue can make you careless. The good news is that the trip design is repetitive by nature: same route, same structure. That reduces uncertainty so you can focus on control and footing.
Transportation back to La Paz is about an hour, and you’ll be dropped off near the original meeting point. It’s a tired ending, but it’s also a clean one—no extra scrambling for onward plans.
Price and Value: Is $319 Fair for a 6,000 m Summit Attempt?
At $319 per person for a 2-day summit-style trip, the value comes from what’s included—not just the location. You’re paying for a professional mountain guide, transport, main meals and drinks at camp, a cook, a 1-night accommodation, and core climbing safety gear like crampons, ice ax, harness, and the ropes/protection.
The price also reflects that you’re doing a high-altitude operation with fixed logistics: high camp at 5,150 m, an overnight refugio setup, and a full summit day. These aren’t “bring your own stuff and figure it out” conditions.
What’s not included matters too. You’ll need to cover personal insurance, snacks for the climb, and thermal clothing/layers beyond what you choose to bring. Some items you might expect to be included—like thin liner gloves—aren’t listed as included, so plan on using what you already own or buying lightweight layers ahead of time.
If you want a smoother experience, consider add-ons. The tour lists sleeping bag/backpack availability as add-ons and porters for up to 20 kg as an add-on (cost is one-way only). That porter option can be a real comfort upgrade if you’re carrying more than you should at altitude.
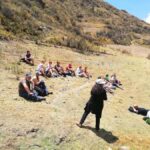
Fitness, Altitude, and Acclimatization: Your Real Checklist
This is where you should be honest with yourself. The trip notes that good physical fitness and some acclimatizing are needed before the climb. It specifically recommends 6 to 8 days between 3,000 m and 5,000 m. An example given is Austria Peak (5,300 m). The point isn’t the exact mountain—it’s that your body needs time to adjust to altitude before you step into 5,600–6,088 m terrain.
One useful detail: crampons and technique are part of the climb, so you don’t need years of glacier experience, but you do need to be able to handle steep, cold, high-altitude exertion for hours at once.
The trip also lists several medical unsuitability categories: pregnant women, people with mobility impairments, people with heart problems, and people with pre-existing medical conditions. If any of those apply, you should treat this as a hard stop and ask a medical professional first.
Diamox and safety
Cetazolamid (Diamox) is listed as something you can take before the climb, with a local-partner suggestion of 125 mg in the morning and 125 mg in the evening. Don’t treat that as a personal prescription. If you’re considering it, confirm with a qualified medical professional who understands high-altitude medicine.
What’s Included in Real Life: Guides, Ratio, and Support
The guide is the main “included” asset, and it’s not just a title. The trip structure includes a professional mountain guide, and the guide ratio is about 1 guide to every 2 participants in shared groups. In private options, it’s 1 guide to each participant.
That ratio matters on a glacier. It affects how quickly you get feedback, how often the guide can watch your footing, and how smoothly transitions go—like gear checks, moving from high camp to the glacier, and the steep sections like Pala Chica.
Equipment is also a major support layer. The trip provides core climbing items like crampons, ice ax, harness, helmet, and ropes/protection. Even if you’ve climbed mountains before, having the right gear fitted and ready can save you time and reduce risk.
One more thing: you’ll be given a free BUFF at the start and a free t-shirt at the end. Not why you climb, but a nice touch when you’re coming home with cold-weather memories.
Weather Reality: What You Should Plan For
The trip notes a key weather rule: there is no refund if the tour is canceled due to bad weather. That doesn’t mean the operator ignores conditions—it means your plan needs a bit of slack.
So I’d treat this as a priority experience with flexible timing around it. If you’re building a bigger Bolivia itinerary, consider keeping buffer days in La Paz rather than locking every hour on your calendar.
Who This Trip Fits Best (and Who Should Rethink It)
This is for you if you want a first serious 6,000 m summit experience and you value structured guiding. It’s also a good match if you already have some hiking/climbing experience and you can handle cold, altitude, and long hours.
It’s less suited if you’re looking for an easy trek. Even with equipment provided, Day 2 is a long glacier day with steep sections and exposed terrain. It also isn’t right for people with the medical and mobility restrictions listed by the trip.
If you can acclimatize well and you’re mentally ready for early starts and intense cold, you’ll likely love how direct the experience is: climb up, sleep high, summit, descend, and go home without turning it into a week-long project.
Should You Book Huayna Potosí for Two Days?
Book it if you meet the altitude readiness window, you can commit to a long summit day, and you want a guided route that takes you from Paso Zongo to high camp at 5,150 m and onward to a real summit at 6,088 m. The included gear and the guide ratio make it much more approachable than doing it alone.
Pass or postpone if your fitness or acclimatization history is thin, if you have any medical risk factors listed as unsuitable, or if you can’t handle the idea that weather can cancel the climb without a refund. If you’re the kind of traveler who plans smart—layers, snacks, hydration, and acclimatizing days—this trip can be one of the most memorable mountains you’ve ever stood on.
FAQ
How long is the La Paz to Huayna Potosí trip?
It lasts 2 days, with day 1 focused on getting from La Paz to high camp and day 2 dedicated to the summit attempt and return.
Where does the first day start and how do you get higher?
You drive from La Paz to Paso Zongo for about 1.5 hours, climbing from around 3,600 m to about 4,700 m, then continue with a 3 to 4 hour trek to high camp.
What altitude do you sleep at?
You sleep at high camp at about 5,150 meters.
What is the highest point you reach?
The summit is 6,088 meters.
How long is the summit day?
Day 2 is a long day, typically 9 to 13 hours of climbing activity.
Is oxygen used during the ascent?
An oxygen bottle is included only for emergencies up to high camp. It is not used for the actual climbing/summit attempt.
What climbing gear is included?
Included gear covers items such as double mountaineering boots, ice ax, crampons, harness, helmet, and ropes/protection. Some cold-weather clothing is also provided.
Do I need to bring a sleeping bag?
A sleeping bag suitable for around -10°C is required. If you book the add-on, a sleeping bag can be provided.
What about medications like Diamox?
Cetazolamid (Diamox) is mentioned as something you can take before the climb, with a suggested local schedule of 125 mg in the morning and 125 mg in the evening.
What should I bring and what’s not included?
Bring essentials like sunglasses, sunscreen, gloves, thermal and warm clothing, snacks, and your ID or passport. Not included items include personal insurance, snacks for the climb, and thin liner gloves (as listed).
If you want, tell me your current experience level and when you’re traveling, and I’ll help you decide if you’ll likely be ready for the 5,600–6,088 m push and what to pack for the cold.