REVIEW · LA PAZ
La Paz: Charquini Mountain Guided Hike
Book on GetYourGuide →Operated by Buhos Tours · Bookable on GetYourGuide
Short hike, serious altitude. This guided Charquini-area trek is built for big Andean views without the full mountaineering effort, and I like how it combines round-trip transport with Laguna Esmeralda payoff. You’ll also get a licensed guide who keeps the group together and helps you manage the climb at high altitude. One real consideration: even though the walking time is short, the elevation can still feel tough if you’re sensitive.
The best part is that the trip is about the journey—photo stops at famous highlands, then a controlled hike up to a crystal-clear lagoon. I also like the practical safety touches: oxygen for emergencies and walking sticks that help on rocky ground. The drawback is simple: this isn’t a stroll, and you should plan on the altitude doing most of the work, not your legs.
In This Review
- Key things I’d zero in on before you go
- Charquini Mountain guided hike: a high-altitude day that stays doable
- Meet-up and ride: how the La Paz to Charquini day actually runs
- The van stops that set the mood: Apacheta Jilarata and the highland viewpoints
- Milluni cemetery and Laguna Milluni: why these stops aren’t just detours
- The main event: the hike from about 4,600m to the lagoon
- Laguna Esmeralda at the top: what you’re chasing, and how weather changes it
- Guides, safety, and pacing: what makes the best days feel easy
- Price and the real budget: $39 plus the entry fee reality
- What to pack for Charquini: layers, traction, and altitude helpers
- Weather can flip the day’s look in minutes
- Who should do this hike (and who should not)
- Should you book the La Paz Charquini Mountain hike with Buhos Tours?
- FAQ
- Where is the meeting point for the Charquini hike?
- What’s included in the tour price?
- Is the hike to the snow-capped peak included?
- How high do you go during the hike?
- How long is the hike part of the day?
- Do you pay an entry fee?
- What should I bring?
- What should I avoid bringing?
- Is the tour held in bad weather?
- How big is the group and what languages are offered?
Key things I’d zero in on before you go
- You’re chasing the lagoon, not the summit: no hike up to the snow-capped peak
- Scenic stops are part of the experience: Huayna Potosí, Chacaltaya, Apacheta Jilarata, and more
- Altitude timing matters: start around 4,600m and reach roughly 5,024m at the lagoon
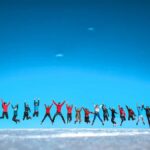
- Small-group pacing: limited to 15 people, so the guide can adjust to slower hikers
- Safety gear included: oxygen is carried in case someone needs it
- Pack-light hike rules: no luggage or large bags, so plan smart for photos and layers
Charquini Mountain guided hike: a high-altitude day that stays doable
If you’re in La Paz and want a mountain-lake day without committing to a full multi-day trek, this hike makes a lot of sense. The Nevado Charquini region sits in that classic Altiplano zone where the air is thinner, the views are huge, and the trail doesn’t need to be long to feel demanding.
What you’re really buying is a guided, structured route to a lagoon at about 5,000 meters. That’s the sweet spot: enough elevation to feel the Andes clearly, but not a “climb until you’re spent” schedule. Your day centers on the walk from the trail start up to the lagoon shores—then time at the water for photos and a break before you head back down.
And the tour is built around seeing more than one place. Along the way, you pause at landmarks and viewpoints around Lake Milluni and the Chacaltaya area. So even if clouds roll in (it happens here), you still come away with memorable stops, not just one viewpoint.
You can also read our reviews of more guided tours in La Paz

Meet-up and ride: how the La Paz to Charquini day actually runs
You meet your guide at Buhos Tours near San Francisco Church or near Which Market. From there, you’re in a van for a big chunk of the day, with stops along the drive for photos and short visits.
The tour runs about 8 hours total, and the pacing is designed around high-altitude realities: slower uphill movement, frequent check-ins, and time to enjoy the lagoon without rushing. The schedule includes multiple van legs plus several short stops. Expect the road to be a bit rough at times, since you’re heading into remote highland terrain.
This transportation format is a value point. Paying for a guide and vehicle means you don’t have to solve the hardest part yourself: getting out to the right trailheads and knowing what to look for at each stop. You also get a small snack during the day, plus walking sticks to reduce strain on uneven sections.
If you’re short on time in La Paz, this itinerary can feel like the “right-size” option. Several hikers in the area compare it to a short acclimatization hike—challenging mostly because of breathing at elevation, not because the route is extremely technical.
The van stops that set the mood: Apacheta Jilarata and the highland viewpoints
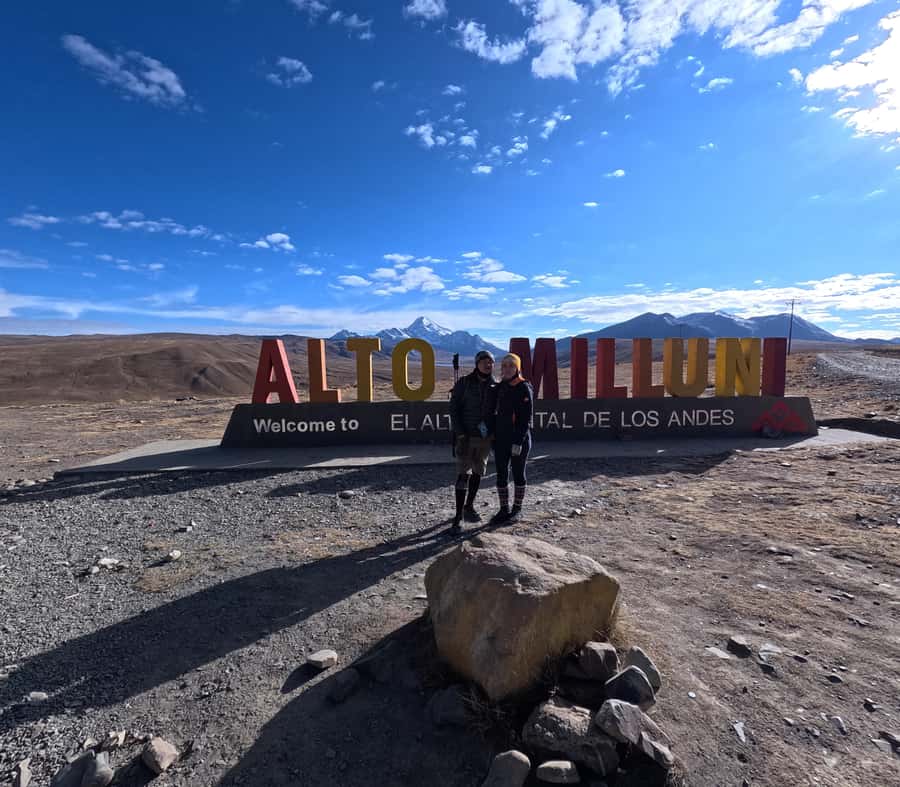
Before you lace up your boots, you’ll get those early “this is why we came” moments. One of the first stops is Apacheta Jilarata, a photo stop where you can scan out over the Andes surroundings. This is also where you’ll start noticing how quickly the region changes in feel: colder air, brighter light, and that wide-open sense of height.
Another set of pauses happens around the Milluni area and the Chacaltaya vicinity. You’ll see views over places like Lake Milluni and Chacaltaya, plus the dramatic peaks in the distance when the weather cooperates. Even when the sky goes gray, these viewpoints help you understand the geography before you reach the lagoon.
One small practical tip: these early stops are great for getting layered up. Once you start moving uphill, you’ll warm up. Later, at the lagoon—especially in wind or light snow—you can cool fast. So use the driving pauses to adjust your hat, gloves, and jacket before you start climbing.
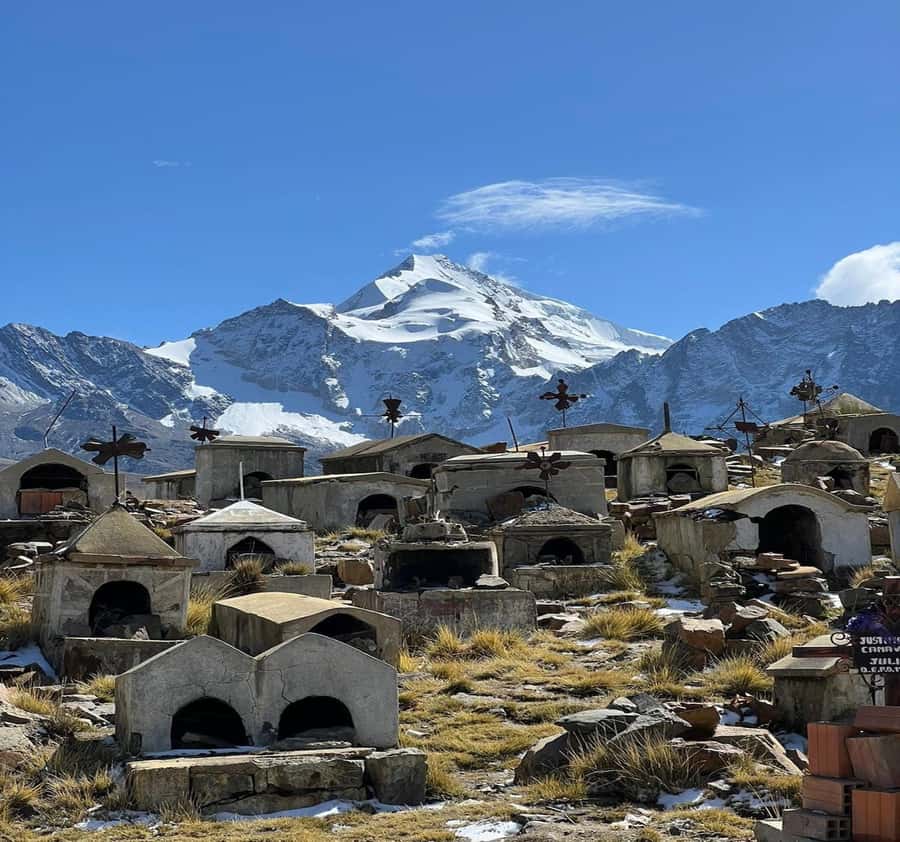
Milluni cemetery and Laguna Milluni: why these stops aren’t just detours
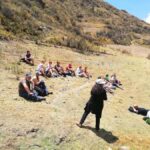
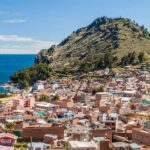
The stops around Cementerio de Milluni and Laguna Milluni add a meaningful human-and-natural dimension to the day. You’re not just chasing a final photo. You’re learning the context of the region while the van moves between trail sectors.
At Cementerio de Milluni, you’ll get a guided visit. This is a mining cemetery tied to the area’s history of high-altitude work and danger. It’s worth treating it with respect. The tour guide typically uses this stop to explain what you’re seeing, and it’s one place where your mind can slow down for a minute before the physical effort begins.
Then there’s Laguna Milluni, another stop with a visit and guided tour. This gives you a chance to see how the water and mountains interact across the Altiplano. It also acts like a preview: you’re already looking at highland water, so when you later reach the higher lagoon, you’ll recognize the pattern and appreciate the differences.
If your goal is purely the biggest lake photo, these stops can feel like extra time. But for most people, they make the day feel fuller—and more “Bolivia in the real world,” not just a transfer to a single viewpoint.
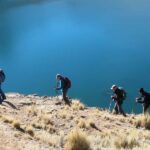
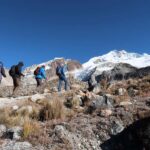
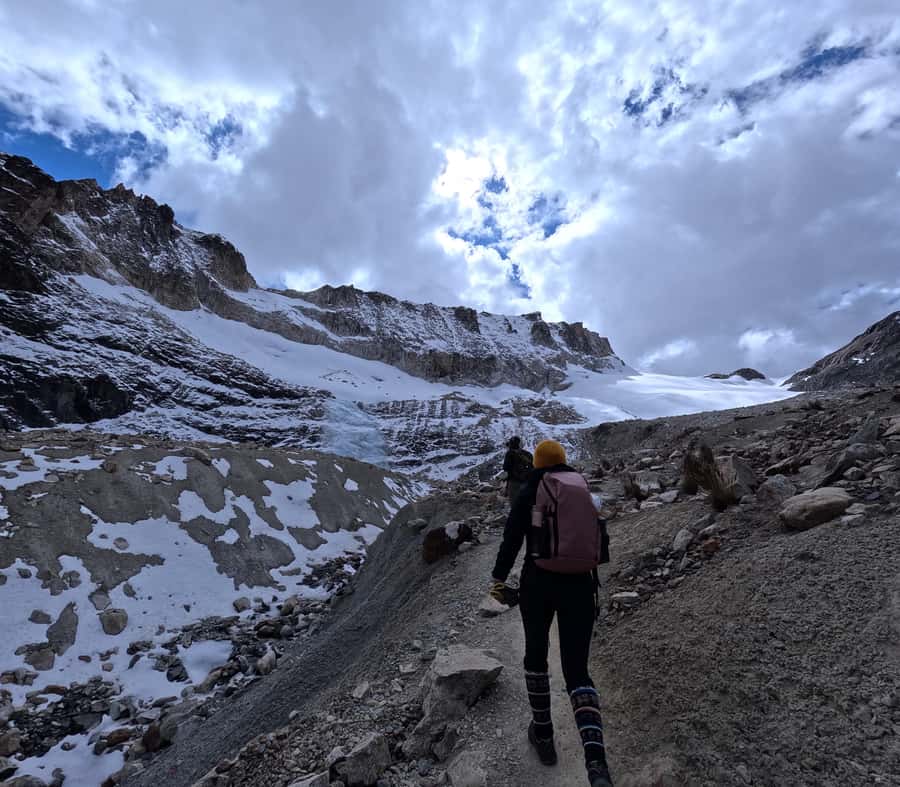
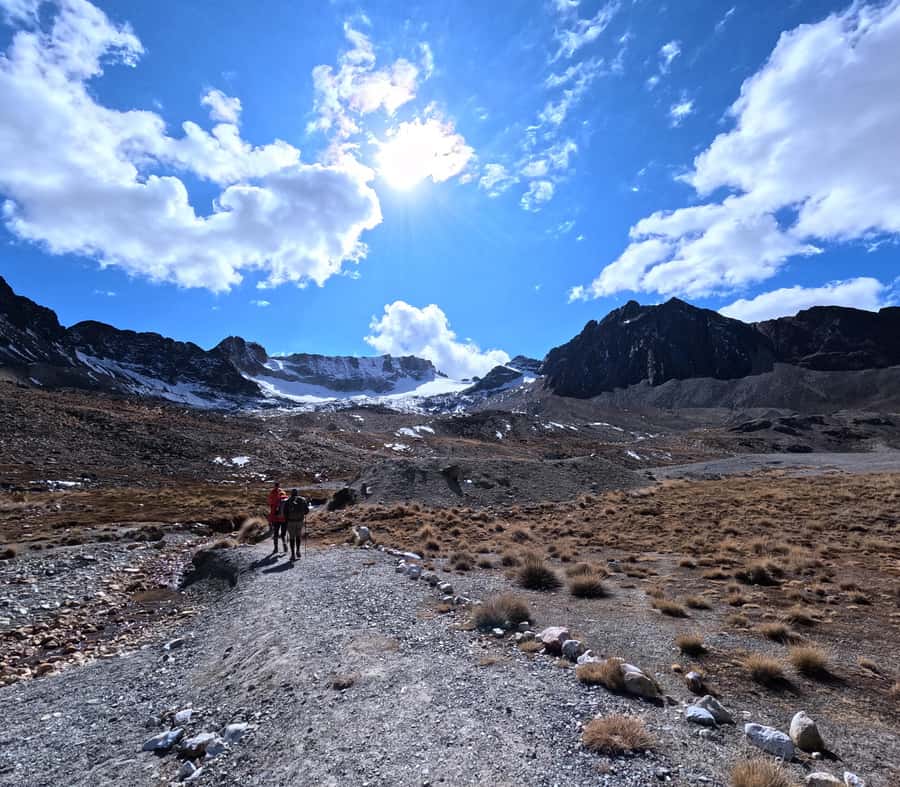
The main event: the hike from about 4,600m to the lagoon
The hike itself is the heart of the trip. Your destination is Laguna Charquini or Laguna Esmeralda, depending on the day’s conditions and the route plan. Either way, the emphasis is the same: a guided walk that brings you up to the lagoon rather than toward a snow-capped summit.
Here’s the key altitude info you should plan around:
- You start around 4,600m
- You hike up for roughly 1.5 to 2 hours
- The lagoon area is around 5,024m
- You’ll come back down afterward and still make it back to La Paz by about 15:30 in the planned schedule
The good news: the distance is short for a mountain hike. The not-so-good news: at 5,000m, every step costs more energy than you expect. This is why guides strongly favor steady pacing. Even if you’re fit, you may feel like you’re moving slowly—that’s normal here.
Guides also tend to build in time for breaks and photos. You’re on high ground, and weather can change fast, so it’s better to pause and breathe than to try to “push through” and then suffer.
If you’re worried about difficulty, this is often the kind of hike people use to test acclimatization before longer trips. Still, the tour isn’t marketed as easy for altitude-sensitive bodies.

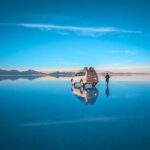
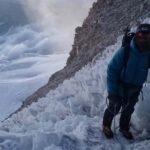
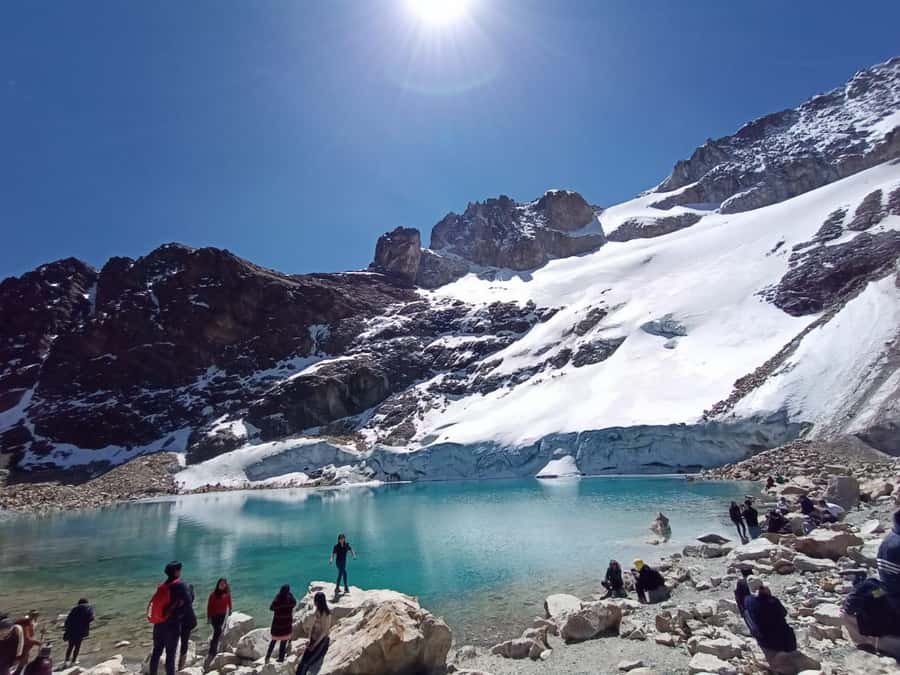
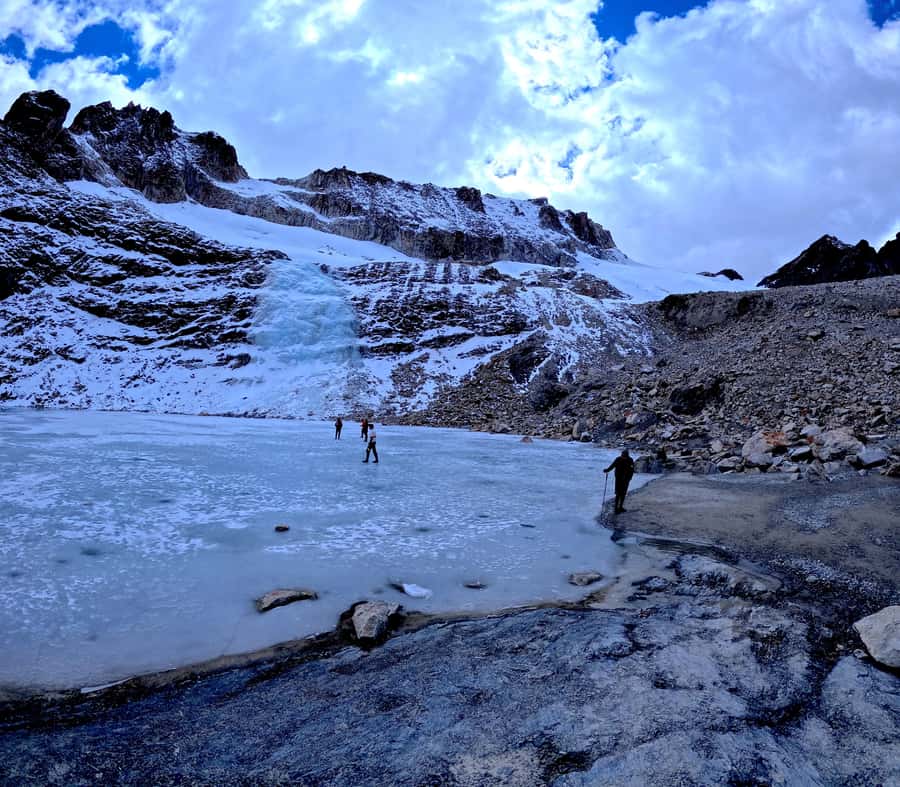
Laguna Esmeralda at the top: what you’re chasing, and how weather changes it
Once you reach the lagoon, the reward is immediate: a water surface that mirrors sky and mountain shapes. Laguna Esmeralda is known for clear, mineral-rich waters that can look intensely colored depending on light and conditions. When it’s bright and cold and calm, the reflections can feel unreal.
At the lagoon, you’ll usually have time to:
- pause at the shore for photos
- enjoy the view with your guide
- take in the surroundings (including the glacier and snowy peaks in the region when they’re visible)
This is also where the clothing strategy matters most. It can feel surprisingly cold even if the uphill portion warmed you up. Pack for wind and sudden weather. If snow or hail rolls in, your experience can shift quickly from “perfect reflection photos” to “fast scenic snapshots,” but it won’t kill the trip—just change the look.
One practical note from the patterns of the day: timing at the top can vary depending on clouds and group flow. Some schedules seem to put people at the lagoon earlier than other groups, which means fewer crowds and more time to enjoy your photos without rushing.
Guides, safety, and pacing: what makes the best days feel easy
High altitude can be intimidating. That’s why the guide quality matters here. The strongest guides focus on safety-first pacing: watching the group, keeping the slower hikers moving at a comfortable rhythm, and not treating the hike like a race.
This operator includes emergency support: oxygen is carried for altitude emergencies. That’s not a small detail. In a short hike, people still can get hit by altitude, and having oxygen on hand is a reassuring layer.
You’ll also notice practical leadership in how the group is managed:
- guides often stay in close contact with people behind and ahead
- they encourage steady movement
- they may recommend altitude helpers like coca for comfort
In real terms, this means you’re less likely to feel lost or pressured. A short hike can still stress you. When your guide handles pace calmly, you spend your energy on breathing, not anxiety.
And yes, the guide can also improve the day’s photos. Some guides are active about pointing out angles and timing, like when to take pictures before the light shifts.
Price and the real budget: $39 plus the entry fee reality
On paper, the price is $39 per person, and that’s a fair value for what you get: bilingual guide, round-trip transport, snack, walking sticks, and emergency oxygen. For a guided high-altitude day, those inclusions matter more than you might think.
What’s not included: an entry fee (listed as Bs20). Also, based on how payments sometimes work on the ground, you may encounter smaller local charges for access and facilities (like toilet fees) depending on the exact area you enter that day. Build a little cash cushion.
So your quick budgeting mindset should be:
- Start with the ticket price ($39)
- Add an entry fee in Bolivianos (at least Bs20 as listed)
- Bring extra cash for small purchases if you want them
It’s not just about “paying extra.” Paying attention to fees helps you avoid awkward delays right before a cold uphill start.
What to pack for Charquini: layers, traction, and altitude helpers
This is a hike where comfort directly affects how you enjoy it. The tour asks for practical items: comfortable shoes, hat, camera, jacket, and food and drinks plus water. Cash matters because of the entry fee and small on-the-way purchases.
Here’s what I’d prioritize in your daypack:
- Layers: warm top for the lagoon, lighter for the uphill
- Hat and gloves: many people underestimate how cold it gets near the water
- Water: even on a short hike, you’ll want it
- Snacks: you get a small snack, but it can help to have your own too
- Cash: for entry and small purchases
A smart altitude tip: coca is commonly used here. Some hikers specifically recommend bringing coca to chew, and others mention coca tea being available at small stops before you start the hike. If you’re already accustomed to it, it can be a comforting ritual at altitude.
Also remember the rule on gear: no large bags or luggage. Pack light enough that you can move quickly when it’s time to hike and pause for photos.
Weather can flip the day’s look in minutes
This tour runs rain or shine, so you should treat it like a true mountain day, not a fair-weather outing. In the region, conditions can go from bright to snow or hail unexpectedly.
What changes when the weather turns:
- your visibility of peaks like Huayna Potosí and Chacaltaya
- the color and clarity of lagoon reflections
- how long you’ll want to stay out at the shore (wind can make you want to move faster)
The upside is that the hike still stays worthwhile. Even if clouds hide the far peaks, you’re still walking on real Andean terrain and reaching a high-altitude lagoon. The day can become more about the atmosphere than perfect photos—and honestly, that can still be beautiful.
Who should do this hike (and who should not)
This is a guided altitude hike, and your body needs to be compatible with altitude demands. The tour is not suitable for:
- pregnant women
- people with back problems
- people with heart problems
- people with respiratory issues
- people with altitude sickness risk (or people who already get altitude sickness)
- people with high blood pressure
- people afraid of heights
- wheelchair users
- people with a cold
- older age brackets listed by the operator
If you’ve never hiked at altitude, start with an acclimatization plan in La Paz before attempting 5,000m-plus. Even “short” hikes can feel hard when breathing is the limiting factor.
Who it suits well:
- you want a short day that still hits high elevation
- you’re comfortable walking on uneven ground
- you want a guide so you’re not guessing logistics or safety
- you like a mix of culture/history stops plus the main lagoon payoff
Should you book the La Paz Charquini Mountain hike with Buhos Tours?
Book it if you want the best kind of compromise: a short guided hike with a real high-altitude destination, plus scenic stops that make the day feel complete. The included oxygen, small group size (limited to 15), and bilingual guiding are strong reasons to feel confident in the structure.
Skip it (or talk to a doctor first) if altitude tends to knock you sideways. This is exactly the sort of hike that’s short enough to tempt you, then still challenging enough to catch you off guard.
If your schedule is tight in La Paz, this tour can be one of your smartest uses of time: you get the mountains, the highland water, and the guided experience without committing to a multi-day trek.
FAQ
Where is the meeting point for the Charquini hike?
You meet your guide at Buhos Tours near San Francisco Church or near Which Market.
What’s included in the tour price?
The tour includes a tour guide (English and Spanish), round-trip transport, a small snack, eco-friendly walking sticks, and oxygen in case of emergency.
Is the hike to the snow-capped peak included?
No. The plan focuses on hiking to reach the lagoon area, not ascending to the snow-capped peak.
How high do you go during the hike?
The hike starts around 4,600m and reaches the lagoon area around 5,024m.
How long is the hike part of the day?
The main hike up to the lagoon takes about 1.5 to 2 hours, and you’ll hike back down afterward. The full day runs about 8 hours.
Do you pay an entry fee?
Yes. An entry fee (Bs20) is listed as not included. You may also encounter smaller on-the-ground fees such as local charges for access and facilities.
What should I bring?
Bring comfortable shoes, a hat, camera, food and drinks, water, a jacket, and comfortable clothes. Also bring cash.
What should I avoid bringing?
Avoid luggage or large bags. The tour also lists no bikes, and it doesn’t allow alcohol and drugs, baby carriages, or electric wheelchairs.
Is the tour held in bad weather?
Yes. It runs rain or shine.
How big is the group and what languages are offered?
It’s a small group limited to 15 participants, and the guide offers English and Spanish.