REVIEW · CUSCO
From Cusco: Palccoyo Mountain Tour full day
Book on GetYourGuide →Operated by Chullos Travel Peru · Bookable on GetYourGuide
4 a.m. starts, rainbow mountains by sunrise. Palccoyo Mountain of Colors is a long day that trades a late start for big altitude views at about 4,900m, plus that famous Stone Forest viewpoint where the colors pop even before the hike really begins.
I especially like the way the itinerary builds in photo time and short breaks, because the air is thin and you’ll want moments to catch your breath while the scenery stays in frame.
I also like the practical altitude support packed into the price: walking sticks, an oxygen bottle, and a first-aid kit, along with breakfast and lunch when you actually need fuel. One drawback: the 4:00–5:00 a.m. pickup window means you must be ready early and punctual, and entrance fees to Palccoyo are extra.
In This Review
- Key highlights I’d plan around
- A 4 a.m. start, cusipata breakfast, and a 6 p.m. return
- Cusipata, the bridges photo stop, and how the route sets the tone
- Getting to Palccoyo Mountain (about 4,900m): short hike, big altitude feel
- The Stone Forest viewpoint: where colors and photos really happen
- Llamas, alpacas, and the Ausangate context you don’t want to miss
- Guides, pacing, and included safety tools (oxygen and sticks)
- Price and entrance fees: what $33 really covers
- What to bring, and what can quietly ruin your day
- Who should choose Palccoyo, and who should skip it
- Should you book the Palccoyo Mountain Tour from Cusco?
- FAQ
- What time is pickup in Cusco?
- Where will you be dropped off in Cusco?
- How high is Palccoyo Mountain?
- Are breakfast and lunch included?
- Is the Palccoyo entrance fee included in the price?
- Is Checacupe Bridge included?
- What’s included for safety and comfort during the hike?
- What should I bring for the tour?
- Is the hike long or walking-heavy?
- FAQ
- Can I cancel for a full refund?
- How do you confirm pickup time?
- Is this tour suitable for everyone?
Key highlights I’d plan around
- Stone Forest photo stop with the kind of views that make your camera feel like it’s too slow
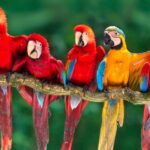
- Llamas and alpacas hanging around during the hike, for more than just mountain color
- Ausangate views showing up along the route and from Palccoyo areas
- Breakfast in Cusipata + lunch on the way back so you’re not hunting food at altitude
- Included altitude helpers like walking sticks, oxygen bottle, and first-aid kit
- Less-crowded feel compared with some other rainbow-mountain options, which helps you enjoy the place
A 4 a.m. start, cusipata breakfast, and a 6 p.m. return
This is a full-day drive with a very early start. Your pickup is generally between 4:00 a.m. and 5:00 a.m., and exact timing depends on where your hotel sits since it’s a group pickup. If you’re the last stop, it can mean extra waiting time before you roll out of Cusco. And yes, your alarm clock will get blamed.
The basic rhythm is simple and practical: head south toward Cusipata, eat breakfast there, then keep driving to the Palccoyo area. You’ll also get one or more stops for photos en route, so you’re not just stuck in a bus the whole time. The day ends with a return to Cusco around 18:00, and you’ll be dropped one block from Plaza Regocijo.
A 12.5-hour day (the full duration is listed as 750 minutes) can feel like a lot, but it’s set up this way because Palccoyo is at high altitude and you want to catch the best light and views. In practice, that means you should go into it well-rested, with snacks in your head (not in your bag—more on that below), and a pace strategy: slow steps, frequent breaks, and lots of water.
You can also read our reviews of more tours and experiences in Cusco
Cusipata, the bridges photo stop, and how the route sets the tone

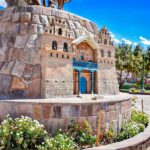
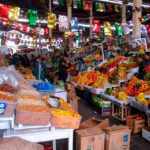
Breakfast in Cusipata is more than a perk. At high altitude, you want your stomach ready before you start moving uphill. Cusipata also acts like a reset point: you’ll eat, regroup, and then the day shifts fully into mountain mode.
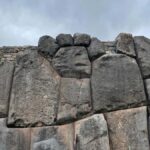
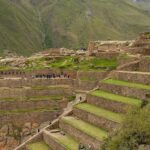
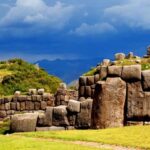
Before you reach Palccoyo, you’ll stop to take pictures of a colonial bridge and an Inca bridge. That’s a neat touch, because it gives you a sense of how layered the region is—Spanish-era architecture and Inca-era engineering sitting side by side.
There’s also a note about Checacupe Bridge being optional for an extra fee. That matters if you’re working with a tight budget or you want the most direct time at the top. If Checacupe is on your mind, confirm early with your guide how it’s handled that morning, since optional extras can add time to the already-long schedule.
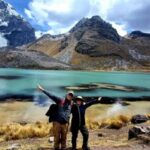
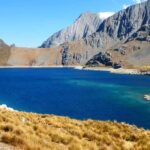
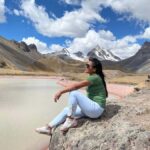
The road continues toward the Palccoyo area where you’ll be able to see part of the Ausangate snow-capped mountain in the wider views. You don’t need to be a mountaineer to appreciate this. It helps you understand you’re not just chasing a photo spot—you’re moving through a big Andean landscape where the peaks define the day.
Getting to Palccoyo Mountain (about 4,900m): short hike, big altitude feel
Palccoyo sits at roughly 4,900m. That altitude is the real headline. Even if the hike itself doesn’t involve huge distances, the thin air can make a “short” walk feel like a workout. This tour specifically notes that it does not involve much walking, but one common theme from experience reports is that you’ll still need breaks and encouragement to keep going comfortably.
Once you arrive, you’ll get free time to take pictures and enjoy the area. This is key: you’re not forced into a rushed line. You’re given room to look around, set your shot, and slowly adjust your breathing. That matters at altitude, where you’ll either pace yourself early or you’ll pay for it later.
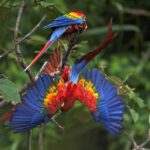
Expect animal sightings too. During the hike, you may spot herds of llamas and alpacas, which adds movement and life to the scenery. It’s a small thing, but it turns the day from a one-subject photoshoot into a more complete experience.
The best time to use your “slow gear” is right away. Take the first few minutes gently. If you feel winded, stop, breathe, sip water. The guides in this area are used to acclimatization style pacing, and you’ll get more enjoyment when you’re not fighting your body the whole way.
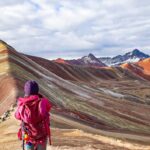
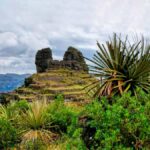
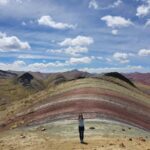
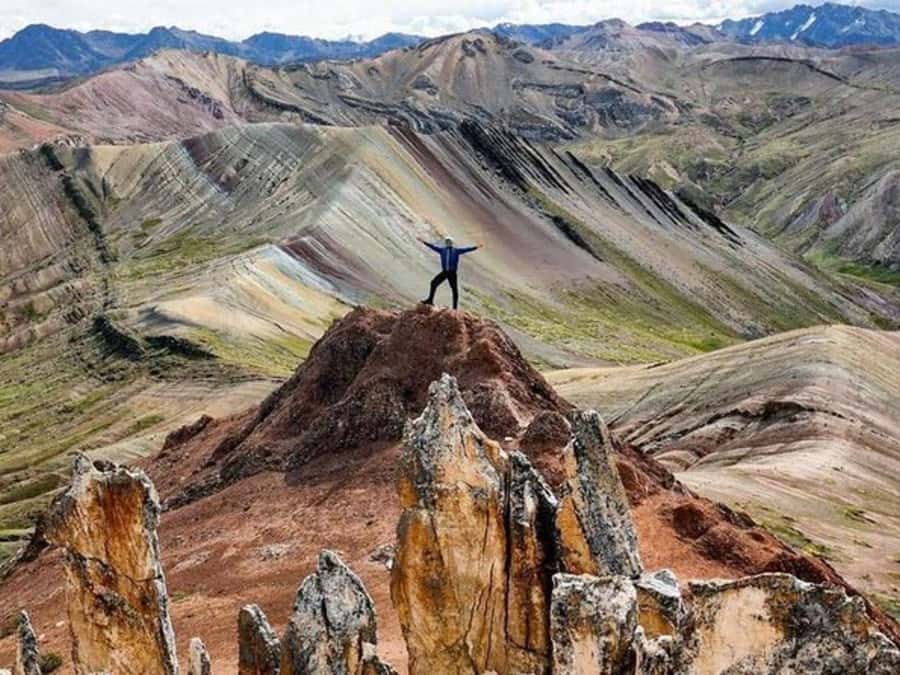
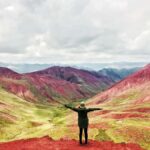
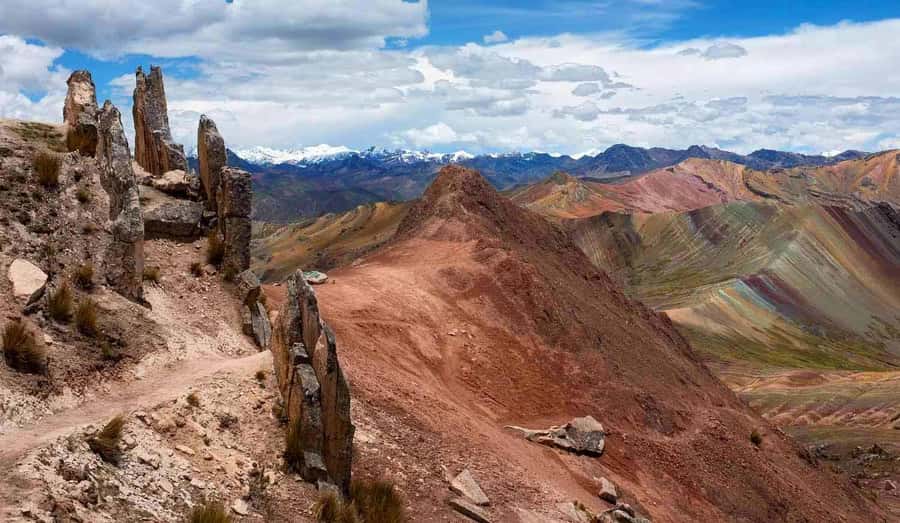
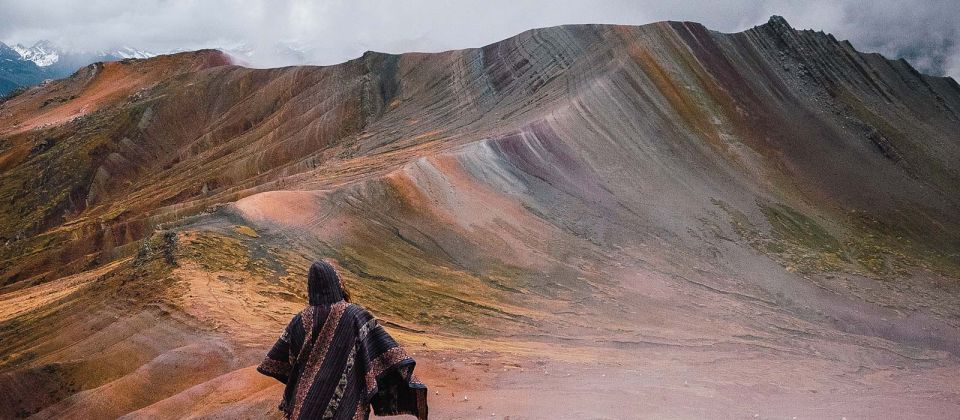
The Stone Forest viewpoint: where colors and photos really happen
The standout moment is often what people call the Forest of Stones (Stone Forest): a section of the hike where the mountain formations and colors create strong visual contrast. This is where you’ll want to stay present. Don’t just point and shoot—pause long enough to look with your eyes first, then frame shots afterward.
At Palccoyo, the mountains give you that “rainbow mountain” look, but it can feel different from the more famous, more crowded options. One of the practical advantages here is that it can feel less crowded, which means you’re more likely to find space for a clean photo without someone cutting through your composition every ten seconds.
You’ll also get views in several directions, not just one postcard angle. Since the itinerary includes multiple photo opportunities (including the bridge stop on the way and the free time at Palccoyo), your day isn’t built around one single “make-or-break” moment. That makes it more forgiving if weather changes slightly or if your energy dips at altitude.
Bring your patience for photos. At 4,900m, your hands can feel slow, so set up your shot carefully and keep your water within reach. This is also the kind of stop where gloves and a hat pay off if it’s chilly when the sun is lower.
Llamas, alpacas, and the Ausangate context you don’t want to miss

A good mountain tour helps you connect the dots between the geography and what you see. Here, you’re given those connections in small doses. You’ll notice the animals along the route and then you’ll watch the peaks in the wider background, including part of the Ausangate mountain.
Why that matters: it makes your photos more meaningful. Without context, you’ll end up with a bunch of pretty shots. With context, you’ll remember where the angles came from and why the colors looked different from one viewpoint to the next.
You don’t need a lecture. The value here is in timing and presence. When the group pauses, use that moment to look up and check where the big peak sits relative to your position. That helps you understand why certain photo angles work better.
Also, because the tour is structured with breaks, you’ll have a better chance to enjoy the animals without feeling like you’re late for the next stop. The day can feel long, so anything that makes it feel alive—like llama sightings—adds a lot of payoff per hour.

Guides, pacing, and included safety tools (oxygen and sticks)
This tour includes bilingual guiding (English/Spanish), plus practical gear: walking sticks, a first-aid kit, and an oxygen bottle. Those aren’t gimmicks. When you’re at 4,900m, they change the tone from “roughing it” to “we planned for altitude discomfort.”
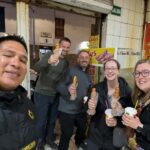
Guide quality is a big deal on tours like this. In many cases, guides are described as supportive and focused on safety and acclimatization, including encouragement to take breaks as needed. One guide name that shows up is Wally, noted for clear explanations and being attentive about how the group was doing.
At the same time, I’d be honest with you: there are occasional reports of early-morning coordination issues and guides who didn’t engage as much as you’d hope. The fix is simple. Ask a quick question early (How many stops? What pace do we keep? Where should we wait?) and speak up if you’re unsure about anything. At 4 a.m., clarity beats guessing every time.
One more practical point: this tour tells you the guide will contact you close to pickup time via WhatsApp (or email if no WhatsApp). Do yourself a favor and check your messages the night before. It’s an early day, and even small confusion can snowball fast.
Price and entrance fees: what $33 really covers
The listed price is $33 per person, and it covers a lot of the big costs that make this kind of day trip workable: hotel pickup (historical center of Cusco preferred), transportation, a bilingual guide, breakfast, lunch, walking sticks, a first-aid kit, and an oxygen bottle.
What’s not included is the entrance fee to Palccoyo Mountain, which you buy on site:
- Foreigners: 15 Soles
- Peruvians/nationals: 10 Soles
There’s also Checacupe Bridge listed as optional for an extra 10 Soles. So your final total depends on whether you add that extra stop.
The value play here is that you’re paying for the logistics and altitude basics, not just the hike viewpoint. If you were to self-organize transport and arrange a guide and meals, the cost would usually climb quickly—especially with an early pickup and a high-altitude day.
My advice: budget for entrance fees in cash before you leave Cusco, and plan your morning like you’ll pay those fees on arrival. Don’t wait until the last second, because that can eat into the very time you’re paying for: your free time at the top.
What to bring, and what can quietly ruin your day

Palccoyo isn’t a “wear anything” kind of hike. You’re at altitude with strong sun and cool air depending on the time of day.
Bring:
- Passport or ID
- Comfortable shoes
- Sunglasses + sun hat (sun can be intense)
- Sunscreen
- Water
- Comfortable clothes
- Gloves (helpful if it’s chilly early)
The tour also says there’s a “not allowed” list. It’s not dramatic, but it matters:
- No luggage or large bags
- No smoking in the vehicle
- No alcohol or drugs
One small but real tip: keep your most-used items easy to grab. At 4,900m, you don’t want to be digging through a bag every time you need a sip of water or to adjust your hat.
If you get motion sickness easily, take that seriously. The day includes a long drive, and the tour notes it may not be suitable for people with motion sickness.
Who should choose Palccoyo, and who should skip it
This tour has a clear “not suitable” list. It’s there for a reason, so treat it as safety guidance, not fine print.
It’s not suitable for:
- Pregnant women
- People with heart problems
- People with vertigo
- People with high blood pressure
- People with recent surgeries
- People with motion sickness
- People who are visually impaired
- People over 95 years
It also notes the tour does not involve much walking, but altitude makes it non-trivial for many bodies. If you’re at all unsure, match your decision to your health and comfort first, and then to your hiking goals.
If you’re generally healthy, enjoy scenic walks, and you want a mountain-color day that includes animals and photos without needing a long technical hike, this can be a very satisfying option. You’re not just buying views—you’re buying a structured, paced way to reach them.
Should you book the Palccoyo Mountain Tour from Cusco?
I’d book this tour if you want:
- a high-altitude day with Stone Forest views and strong photo opportunities
- a plan that includes breakfast and lunch so you’re not scrambling at altitude
- included gear like walking sticks and an oxygen bottle, which lowers stress when you’re feeling the altitude
I’d think twice if:
- you know you struggle with early mornings and long group pickups (4:00–5:00 a.m. is non-negotiable)
- you have any conditions listed as not suitable, especially heart or blood-pressure issues
- you expect a relaxed, quiet hike. This is scenic, but it’s still an organized full-day schedule at elevation
If you’re the type who packs well, paces yourself, and wants an authentic Andes color stop with breathing room for photos, Palccoyo from Cusco is a solid use of a day.
FAQ
What time is pickup in Cusco?
Pickup is generally between 4:00 a.m. and 5:00 a.m. The exact time varies by hotel location because this is a group service.
Where will you be dropped off in Cusco?
You’ll be dropped off about one block from Plaza Regocijo (Regocijo square).
How high is Palccoyo Mountain?
Palccoyo Mountain is listed at about 4,900 meters above sea level.
Are breakfast and lunch included?
Yes. Breakfast and lunch are included as part of the tour.
Is the Palccoyo entrance fee included in the price?
No. The entrance fee is not included and is purchased on site: 15 Soles for foreigners and 10 Soles for nationals.
Is Checacupe Bridge included?
Checacupe Bridge is optional and costs an extra 10 Soles.
What’s included for safety and comfort during the hike?
You get walking sticks, a first-aid kit, and an oxygen bottle.
What should I bring for the tour?
Bring a passport or ID card, comfortable shoes, sunglasses, sun hat, sunscreen, water, comfortable clothes, and gloves.
Is the hike long or walking-heavy?
The tour states it does not involve much walking, but because you’re at high altitude, you should still expect it to feel challenging.
FAQ
Can I cancel for a full refund?
Yes. You can cancel up to 24 hours in advance for a full refund.
How do you confirm pickup time?
The guide contacts you about 10 minutes before pickup via WhatsApp. If you don’t have WhatsApp, they confirm by email the day before.
Is this tour suitable for everyone?
No. It’s not suitable for pregnant women, people with heart problems, vertigo, high blood pressure, recent surgeries, motion sickness, the visually impaired, or people over 95 years old.